Showing posts with label Puntos. Show all posts

Saturday, February 4, 2012

Stripes and Dots

Hello :)
This is a manicure I did for a YouTube V-Day Collaboration. RobinMoses and ProfessionalDQ came up with this idea and JaeMarie2008 invited me to join. I figured I would do something extremely simple because many times we do not have the time to do an extremely fancy V-day manicure.  I used Flower Pink by Santee as a base, for the stripes a white striper and for the dots acrylic white paint.
Here is the video:

xoxo,
Carol Pin It

Monday, January 30, 2012

Early Valentine's Day Manicure Idea

Hello dear readers!
I am showing you one of my V-Day mani ideas for this year. At the same time, I came up with and entered a love themed nail art contest by TotallyCoolNails from YouTube. The inspiration for this simple design comes from Victoria's Secret. I remember walking in there and looking at the 'Noir Tease' perfume bottle... Light pink with a black lacey detail. I loved the femininity of it. I tried to duplicate that image I had in my head, I made a simple "lace"on three of my nails and on the other two, I did some simple stripes with different details. I am still working on my free-handed skills, therefore the unevenness of my details. Finally, when I think of love, I think of femininity, pink, and why not sexy ;)
Ésta vez les estoy mostrando un diseño para uñas del  día de San Valentín para éste año. Al mismo tiempo, ésta es mi entrada al concurso con tema del amor de TotallyCoolNails de YouTube. La inspiración para éste diseño simple viene de Victoria's Secret. Recuerdo entrar allí y ver el frasco del perfume 'Noir Tease'... Rosado claro con un detalle delicado de encaje. Me gustó mucho la femininidad de el frasco. Quise plasmar la imagen del encaje en tres de mis uñas y en las otras dos, hice simples líneas con dibujitos fáciles. Aún estoy trabajando en mis habilidades para dibujar, así que nada es perfecto. Finalmente, cuando pienso en el amor, imagino algo femenino, rosado y por qué no sexy?
xoxo,
Carol
Pin It

Sunday, January 8, 2012

Week 2: French Tip Mani

Hello!
For week 2 of this challenge, I kept it really simple and classic. I did not go crazy with colors because a memory came to mind about french tips. I was about 14 years old and my cousin who was 20 (or 21) took me to a nail salon. That was my first time ever and I got a french mani. I had stubbies back then and it sucked because I could not grow pretty nails... I had brittle and plain ugly nails. I went back memory lane 9 years and now, I have the nails I thought I could never have. I am really happy and I am glad I could bring that memory and say that now I love my nails and that I did them myself :)
I used:
  • Glass Pink by Sinful Colors
  • White by Kleancolor
  • Silver Glitter and White Stripers
  • Black (acrylic paint) by Craft Smart
Make sure to check out Jenna's blog and the other ladies doing this challenge :)


Pin It

Thursday, November 24, 2011

Polka Dots and Hearts

Hey!

HAPPY THANKSGIVING!
This manicure is a way to say thanks to all of you who have visited my blog and those of you who have supported me from the beginning. I really appreciate your comments and visits :) This mani looks more like a Valentine's Day look but there is not a set date to express love right? When I was doing my nails I was on the phone with my boyfriend and he said that he wanted me to add hearts... And so I did, once again thank you so much!!!
FELIZ DIA DE ACCIÓN DE GRACIAS!
Éste manicure es una manera de agradecerles sus visitas y apoyo a mi blog. Gracias por sus comentarios y por tomarse el tiempo de pasar por aquí :) Éstas uñas parecen más de día del amor y la amistad, pero el amor no solo se muestra durante una fecha cierto? Cuando me estaba pintando las uñas, hablaba por teléfono con mi novio y me sugirió agregar corazones a éste manicure... Y así lo hice, una vez más infinitas  gracias!!!


Pin It

Saturday, November 19, 2011

Sinful Colors 'Easy Going' + Nail Art

Hello!
I wore this manicure for a couple of days and I really loved the simplicity of it. I started with 2 coats of Easy Going by Sinful Colors. Then, I drew some simple flowers using Flower Pink by Santee. I added dots as you see, using my dotting tool and Glorious Gold by Americana (acrylic paint).
I hope you try it.

Éste manicure lo tuve por un par de días y me gustó mucho la simplicidad que posee. Empecé con 2 capas de Easy Going de Sinful Colors. Dibujé unas flores sencillas utilizando Flower Pink de Santee. Agregué puntos usando mi puntero y la pintura acrílica Glorious Gold de Americana. Espero lo intentes :)
xoxo,
Carol


Pin It

Sunday, October 16, 2011

Juicy Yellow, Mellow Yellow

Hello!
This time I am using Mellow Yellow by Sally Hansen. I added a coat of Firefly by Jesse's Girl which gave it dimension. To finish up, I added black dots with Black Creme by WnW and a flower on my ring and thumb nails. Simple, huh?
Ahora estoy usando Mellow Yellow de Sally Hansen. Agregué una capa de Firefly de Jesse's Girl el cual le dió dimensión. Para terminar, coloqué puntos negros con el esmalte Black Creme de WnW y una flor en las uñas de los dedos anular y pulgares.
-Carol <3
Pin It

Friday, October 7, 2011

Girly French Manicure

This is an easy french manicure. You know the drill, pinky background, white tips. I added some pink dots along the edge as well as a 4-petal flower and a black rhinestone on my ring fingernail. Enjoy!
Éste es un manicure francés muy fácil. Ya saben, fondo rosado, puntas blancas. Añadí puntos rosados en el borde blanco y también un flor de 4 pétalos con una piedrita negra en la uña del dedo anular. Espero les guste!
-Carol
Pin It

Wednesday, September 28, 2011

Flowers: Purple and Silver

This nail tutorial is my contest entry to Nailsbyyou, a channel on YouTube. I will leave the step by step tutorial so you can attempt it.
Éste tutorial de uñas es mi entrada al concurso de Nailsbyyou, un canal en YouTube. Dejaré aquí el paso a paso para que ustedes lo intenten.

Start with 2 coats of a lavender polish. I used Finger Paints in Lavender Highlight.
Empieza con 2 capas de un esmalte lavanda. Usé Lavender Highlight de Finger Paints.

Add some sheen using a sheer purple polish. In my case it is Wild Card by Wet n Wild.
Agrega brillo con un esmalte morado no cubriente. En mi caso es Wild Card de Wet n Wild.

Using a dotting tool and a silver polish (Kleancolor's Pearly Silver), draw a flower.
Con un puntero y usando un color plateado (Pearly Silver de Kleancolor) dibuja una flor.

Dot black polish to make the center of your flower.
Coloca un puntito negro en el centro de tu flor.

Draw some loops with silver and fill in gaps with black dots. Add a top coat.
Dibuja espirales con plateado y llena espacios con puntitos negros. Aplica un protector.
-Carol
Pin It

Tuesday, September 27, 2011

Flowers, Dots and Glitter

Hi!
This nail look came to me as an improvisation because, just as anytime, I do not know what to do. So here we go. Before getting into the tutorial itself, I would like to mention that many times I do not post detailed step-by-step pictures, that is because many times I start doing my nails and I get too focused and it is until I am basically done that I say, "Hmm, PICTURES!!!!". I think I will be doing this look again and I promise I will take pics this time around.
Hola!
Éste manicure salió de una improvisación porque como siempre, no sabía que hacer. Aquí vamos. Antes de iniciar el tutorial, me gustaría mencionar que muchas veces to coloco fotos detalladas del paso a paso, eso es porque muchas veces cuando arreglo mis uñas, me enfoco mucho en lo que hago y no es sino hasta que he terminado que me doy cuenta que no he tomado fotos. Haré nuevamente este manicure en otra oportunidad, prometo tomar fotos esta vez.

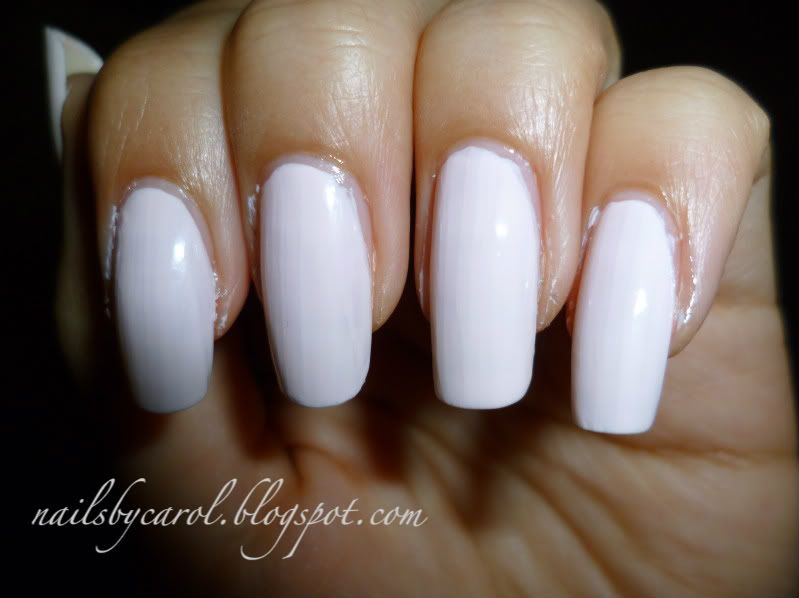
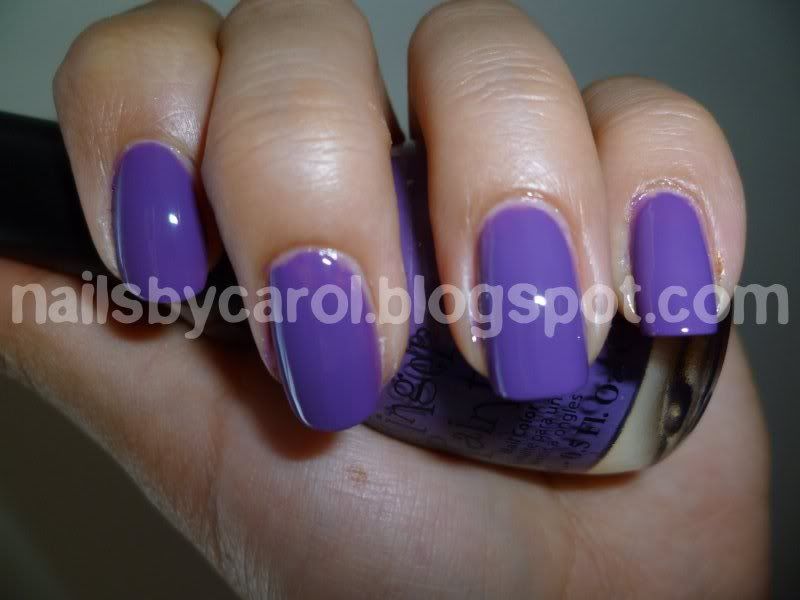
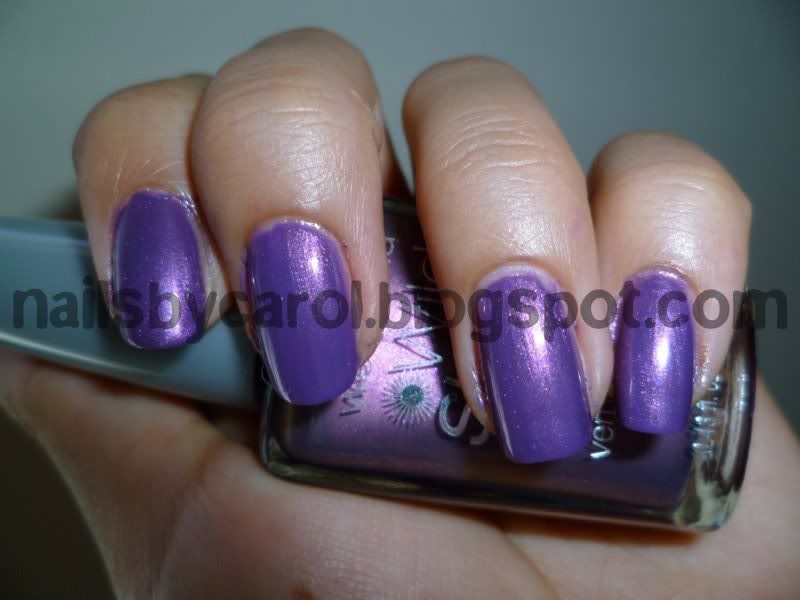
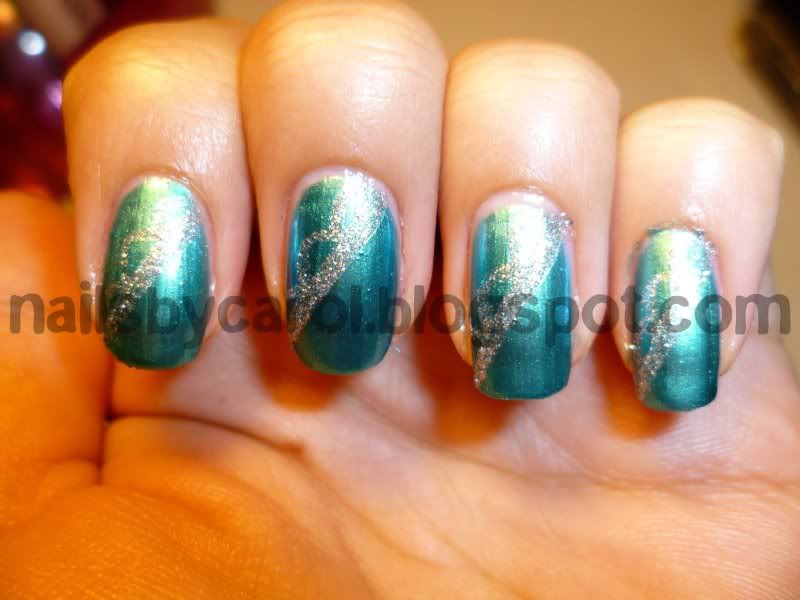
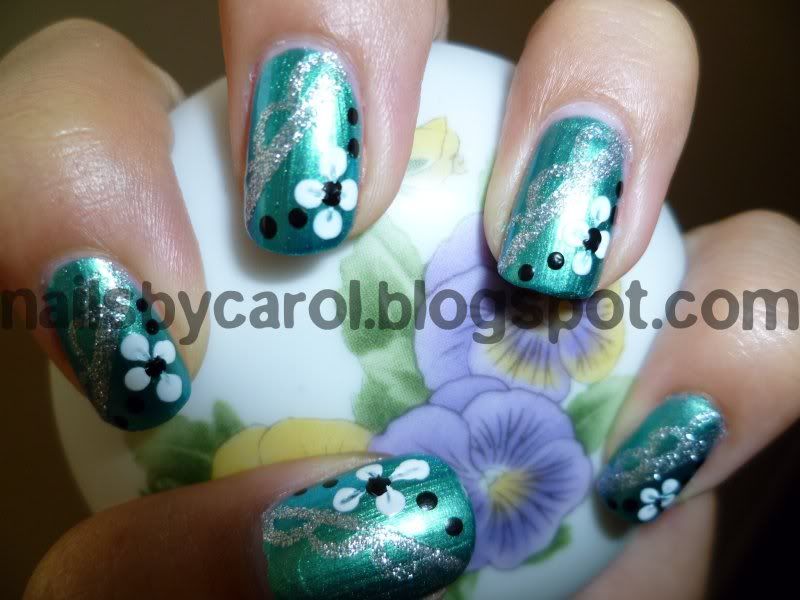
Start with two coats of Gorgeous by Sinful Colors, a green-turquoise polish with some iridescence.
Empieza con dos capas de Gorgeous de Sinful Colors, que es un verde turquesa tornasol.
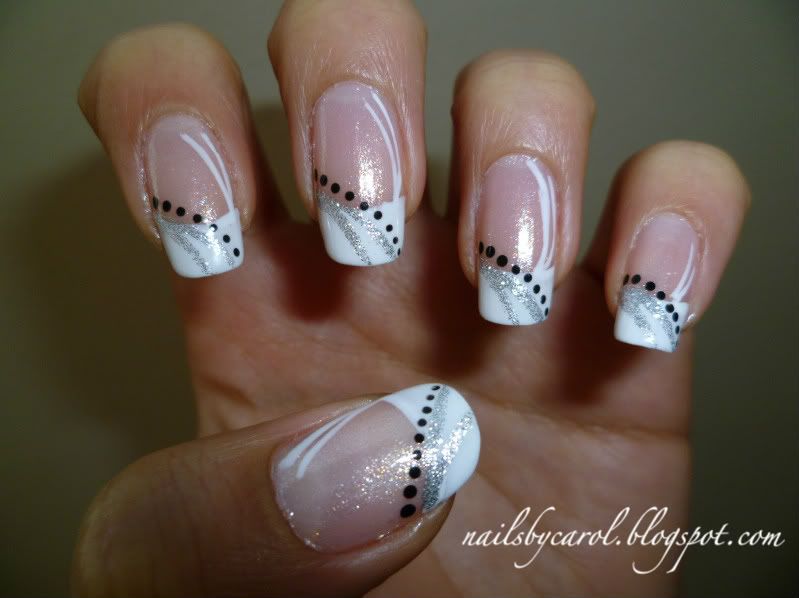
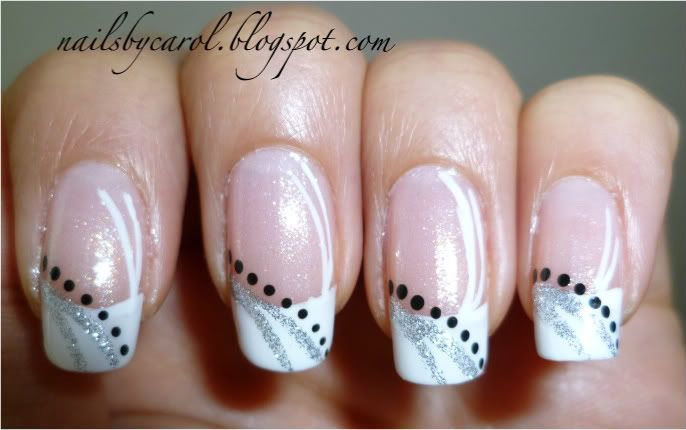
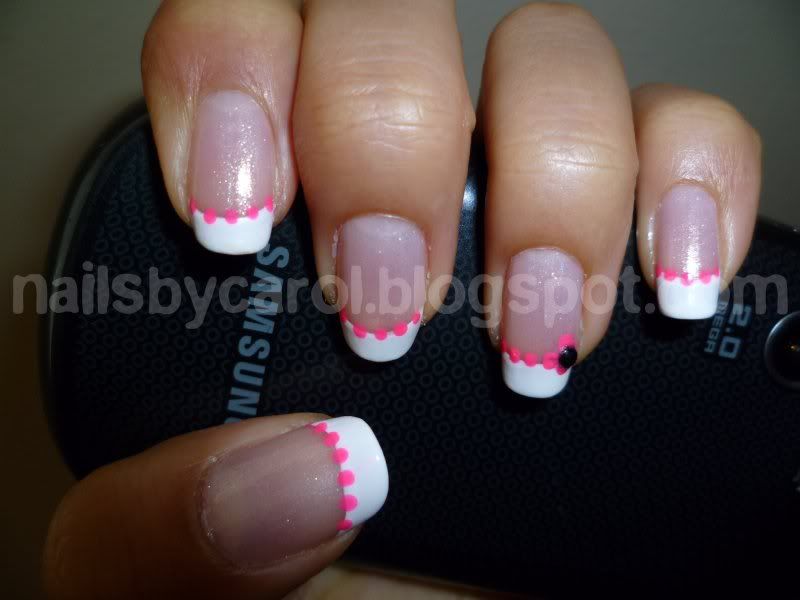
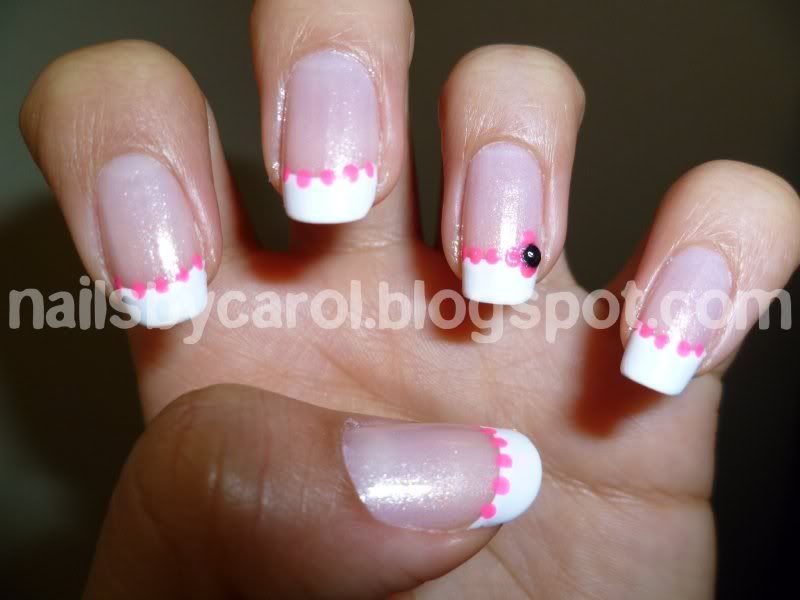
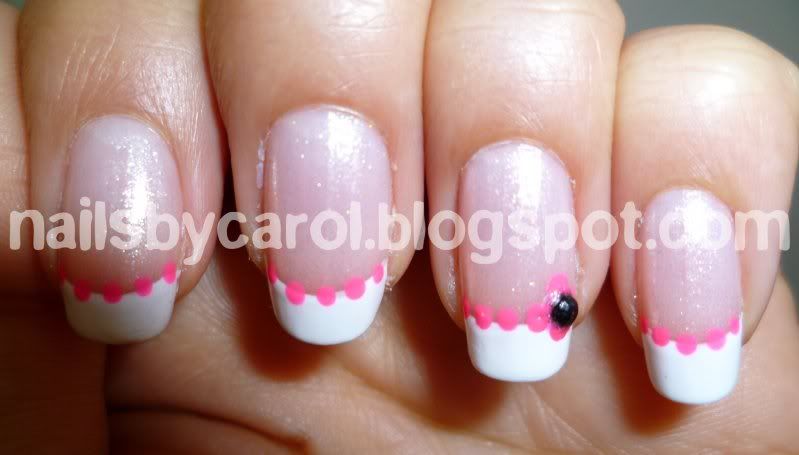
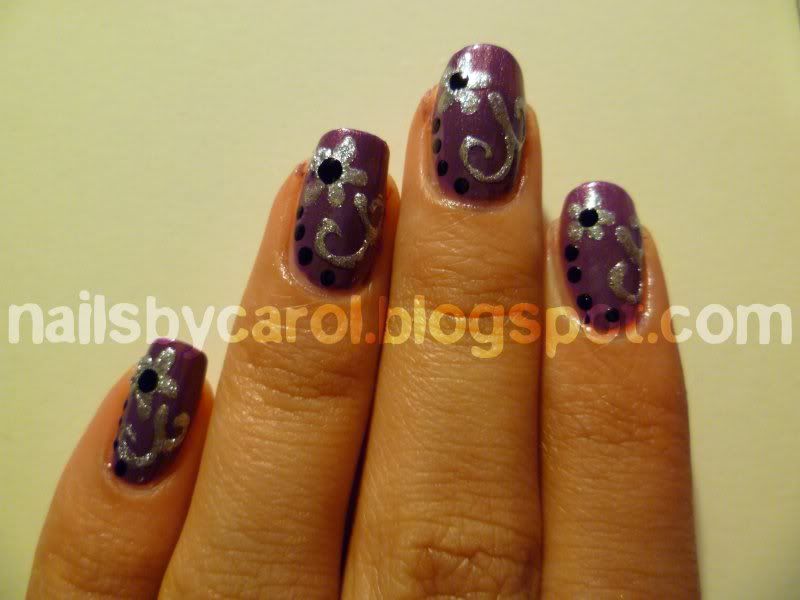
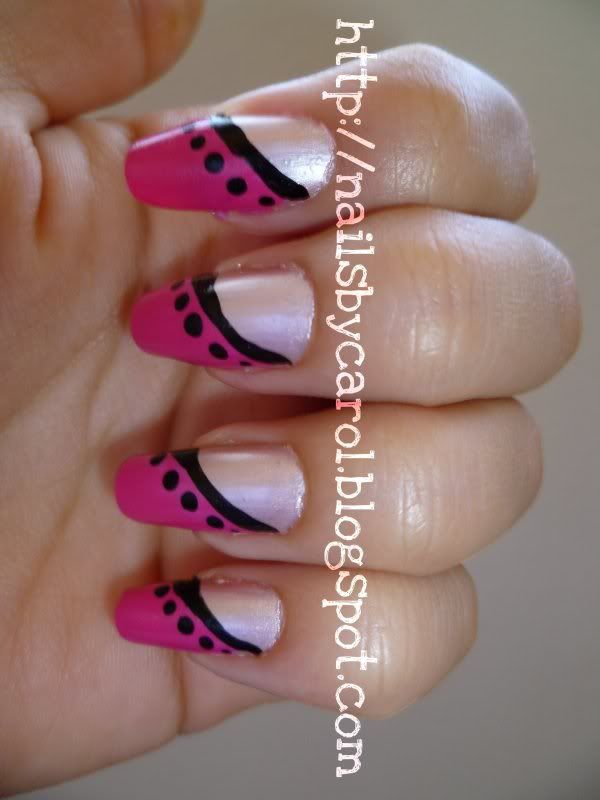
Then, do a diagonal with silver and do little half circles to resemble lace.
Traza una diagonal con plateado y haz medias lunas para que parezca encaje.

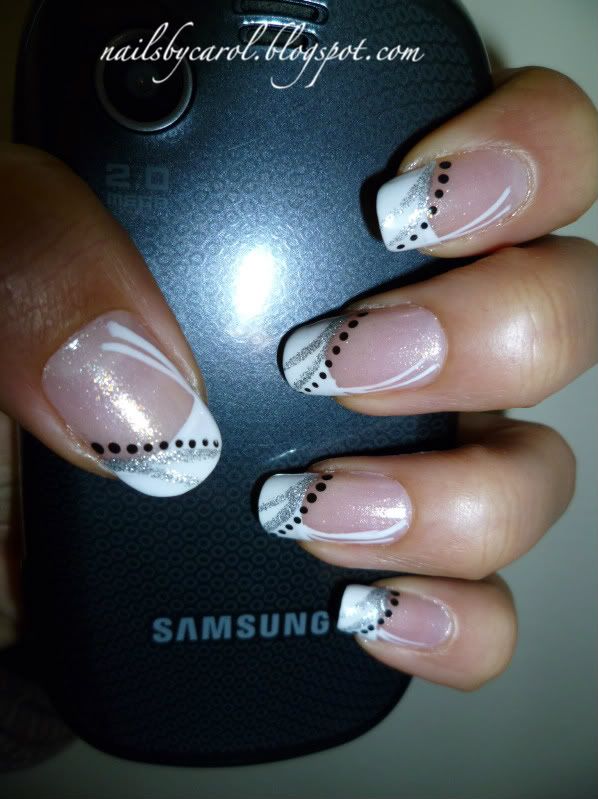
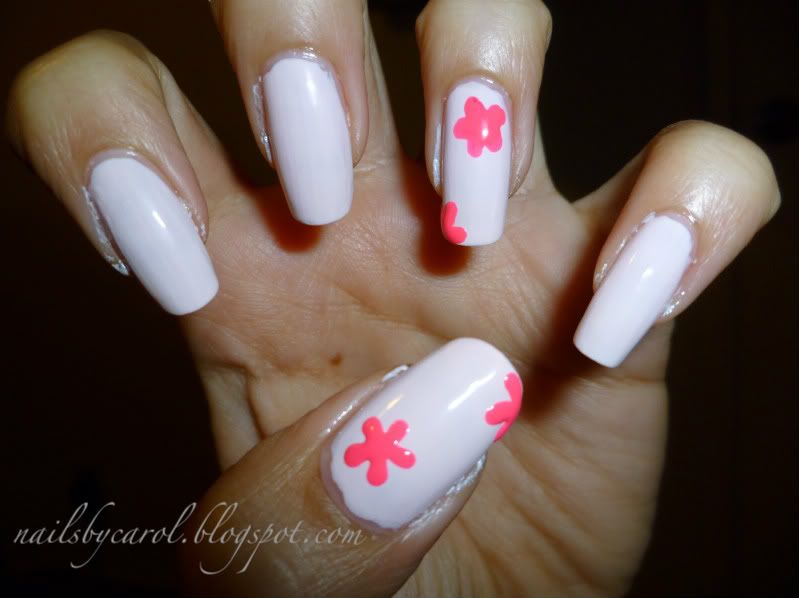
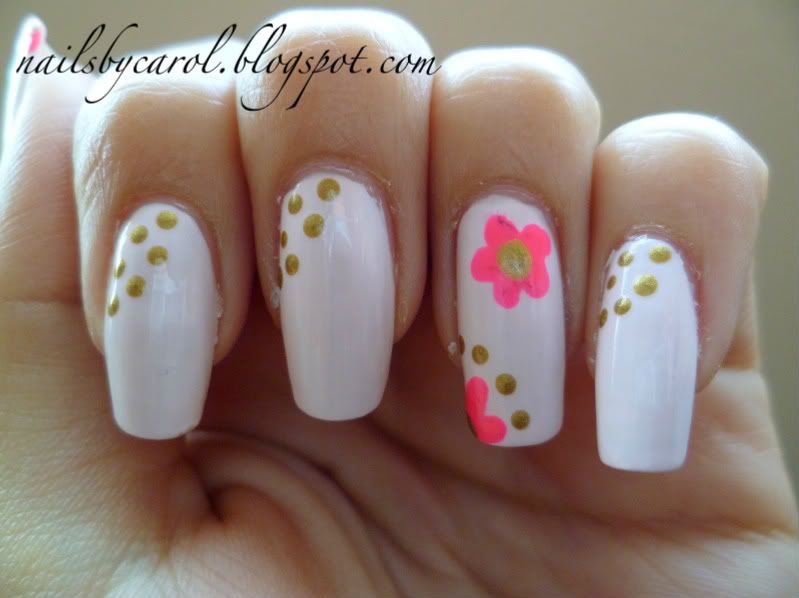
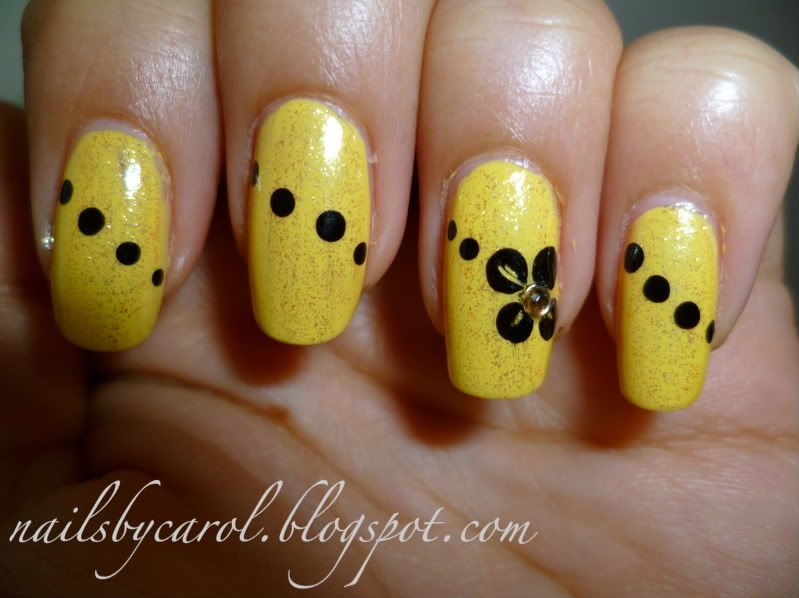
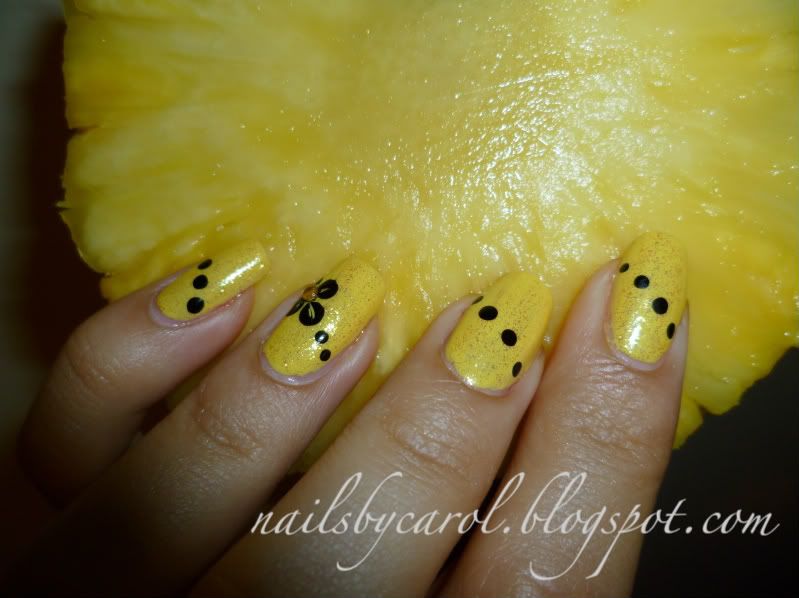
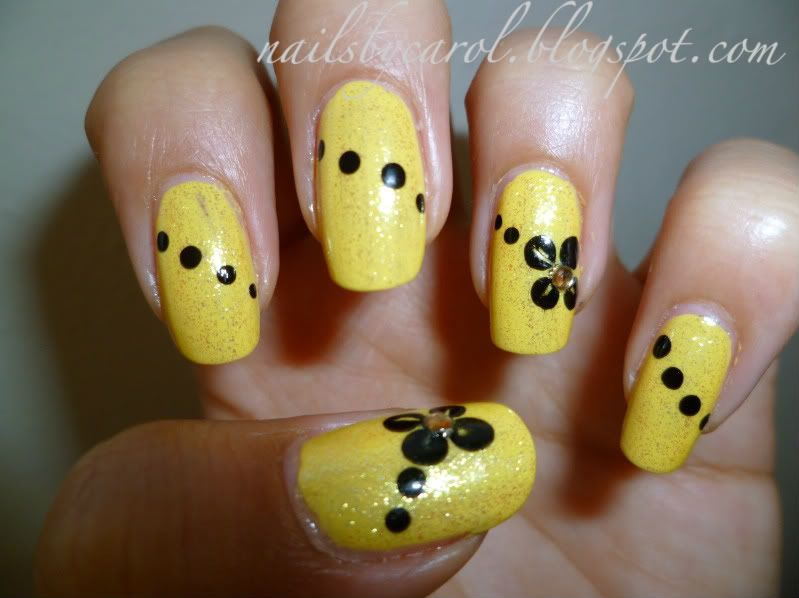
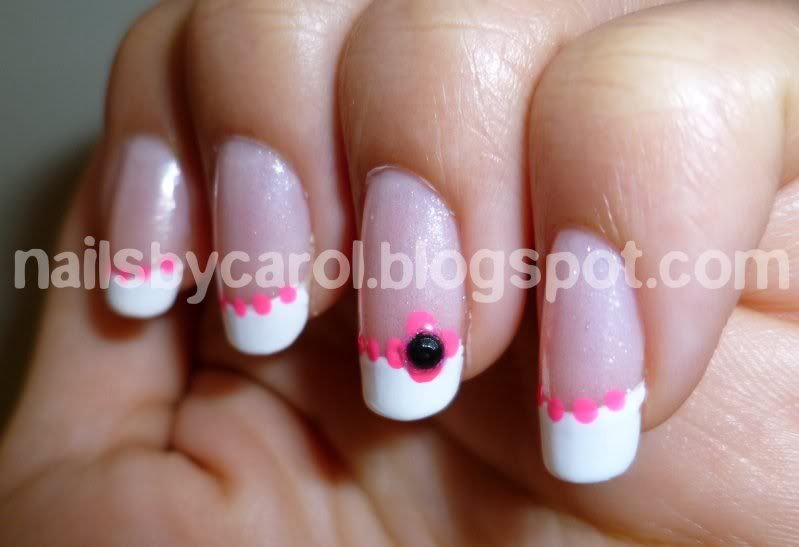
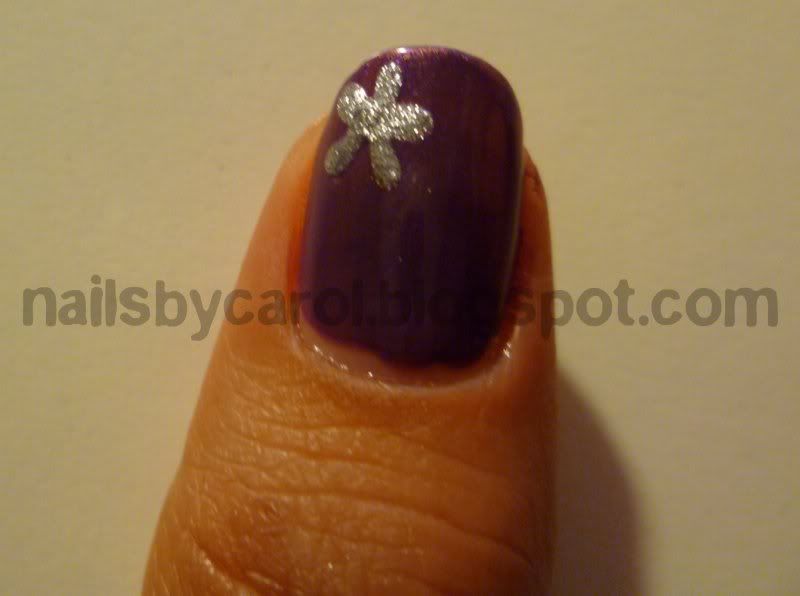
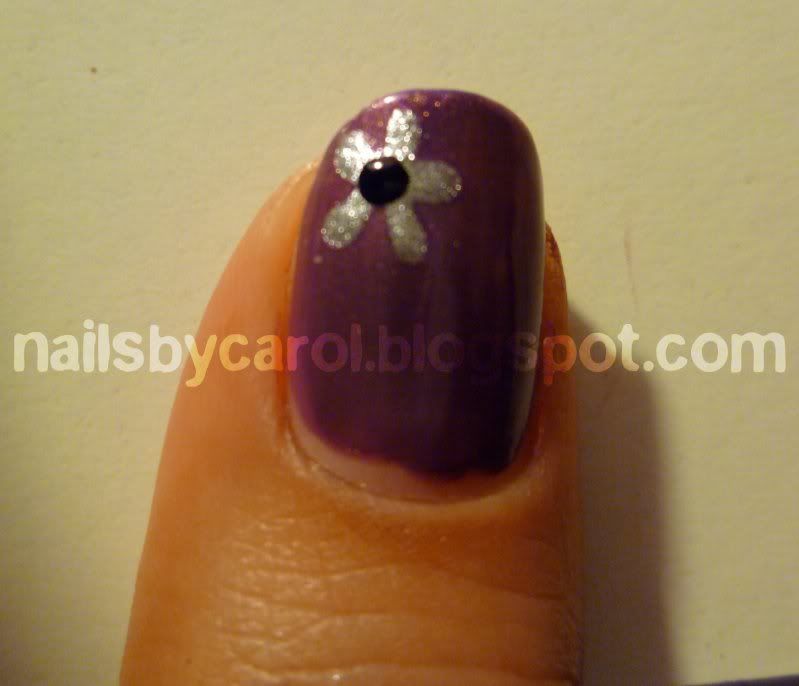
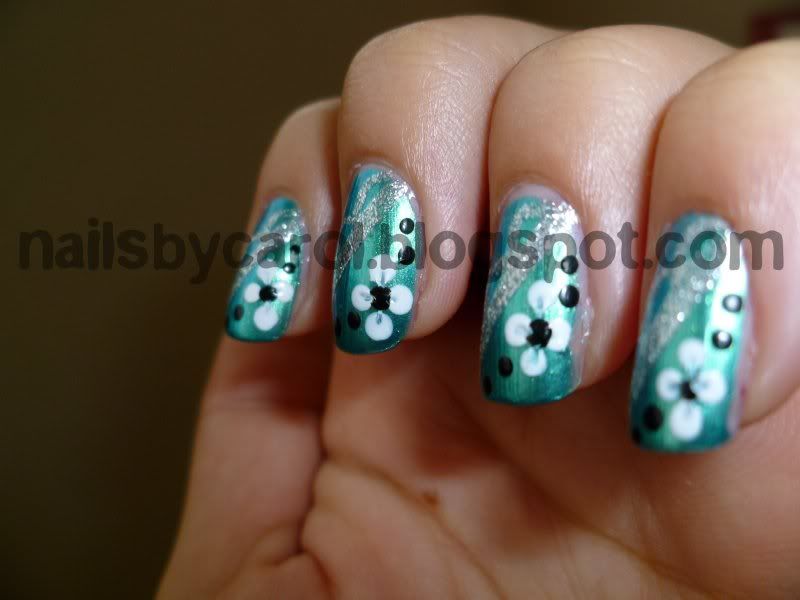
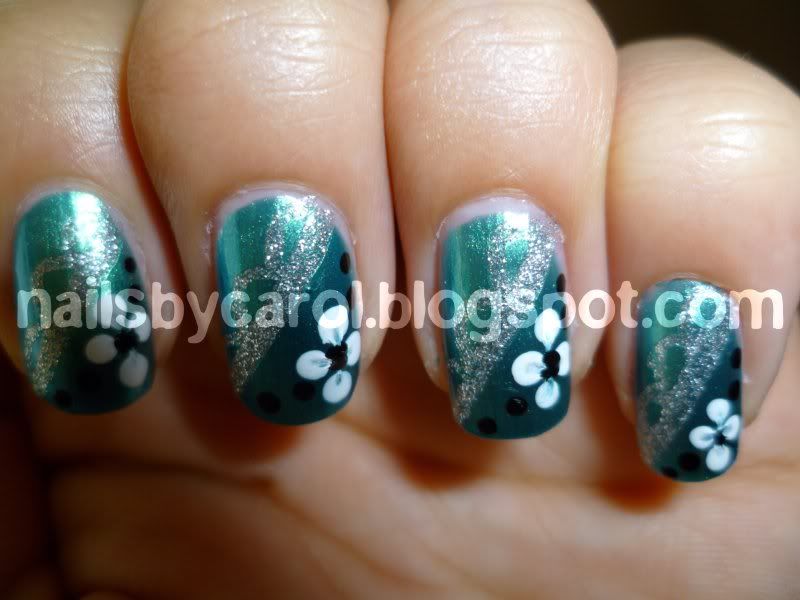
On one of the corners, do a 4-petaled flower and add some random dots.
En una de las esquinas, haz una flor de 4 pétalos y agrega puntos al azar.

Seal it off with a top coat.
Séllalo con un protector de esmalte.
-Carol
Pin It

Friday, September 16, 2011

Bright Pink Manicure

I had had a Santee nail polish sitting around for a while but the color is so bright that I did not know how to use it. To start off, the name of the polish is Pink Flower and it is a neon pink. The polish itself has a nice formula and I only used one coat to achieve full coverage. I hope you like it!
He tenido un esmalte Santee por algun tiempo pero el color es tan fuerte que no sabía como usarlo. Para empezar, el esmalte se llama Pink Flower y es un rosado neon. El esmalte en sí tiene una buena consistencia y usé nada más una capa para lograr una cobertura completa. Espero les guste.

 Apply one coat of a light pink polish (Glass Pink by Sinful Colors).
Aplica una capa de rosado pálido (Glass Pink de Sinful Colors).

Do a side swipe with a neon pink (Flower Pink by Santee).
Cubre la mitad de la uña por un lado con un rosado neon (Flower Pink de Santee).

Do the other side with black (Black Creme by WnW).
Haz el otro lado con negro (Black Creme de WnW).

Add dots and rhinestones. Doesn't it look neat on short nails? Imagine it on longer nails!
Agrega puntos y piedritas. No se ve lindo en uñas cortas? Imagínalo en uñas un poco más largas!
 Carol
Pin It

Wednesday, September 14, 2011

Silver and Dots

Hi Again!
I gave Kleancolor polishes a try and I was a little skeptical after my crackle polish experiment (link to post). The polish I used is called Pearl Silver and it is a beautiful shade with lots of shimmer and it is a million times better than the crackle polishes. I used two coats of that and then I just did some random black and white dots. Nothing special. I hope you like it! By the way, my nails have grown, and this design will work on either long or short nails.
Hola de nuevo!
Le dí una oportunidad a los esmaltes de Kleancolor y honestamente, estaba un poquito insegura después de haber hecho mi experimento con los esmaltes que se agrietan (enlace aquí para el experimento). El esmalte que usé hoy se llama Pearl Silver de Kleancolor y es un color muy bonito con mucho brillo y es un millón de veces mejor que el esmalte que se agrieta. Utilicé dos capas de éste y luego solo agregué unos puntos en blanco y negro. Nada especial, espero que les guste! Por cierto, mis uñas han crecido, pero aún asi, este diseño luce bien en uñas cortas o largas.
 -Carol


Pin It

Tuesday, July 26, 2011

Crazy Purple Dots

This manicure started as a purple french I had in mind, I did not like it and I ended up with purple dots. Enjoy!
Éste manicure inició como un francés morado que se me ocurrió, pero no me gustó y terminé con puntos morados. Disfrútenlo!
  • New Lavander by Nabi
  • Buffy The Violet Slayer by Wet n Wild
1. Apply 2 coats of a lilac polish (New Lavender).
Aplica 2 capas de un esmalte lila (New Lavender).

2. Add dots with a darker color (Buffy the Violet Slayer).
Agrega puntos con un color más oscuro (Buffy the Violet Slayer).
 xoxo, 
Carol
Pin It

Monday, July 25, 2011

I Love Pink

Hey :)

I will share with you this short lived manicure. I had to change it 1 day after doing it because I needed one with more decent colors... But here you go!
Les compartiré este manicure que duró muy poco. Lo tuve que cambiar al siguiente dia de hacerlo porque necesitaba uno con colores más decentes. Aquí se los dejo!

Products Used:
Productos Utilizados:
  • Nude Pearl by Nabi
  • Expecting by Freshcover
  • PA12 Black by Kiss Brush On Nail Art
1. Apply 2 coats of a light/pearly pink (Nude Pearl).
Aplica 2 capas de un rosado pálido aperlado (Nude Pearl).

2. Apply 2 coats of hot pink (Expecting) diagonally covering just 1/2 of the nail.
Con 2 capas de rosado fuerte (Expecting) traza una línea diagonal y solo cubre la mitad de la uña.

3. Define the division of pinks with a black line and make black dots if you wish.
Define la división de los rosados con una línea y agrega puntos negros si lo deseas.

4. Voila!

I apologize for not having the step by step pictures... I lost that file :(
Una disculpa por no tener las fotos del paso a paso... Las perdi :(
xoxo,

Carol 
Pin It