Wednesday, July 27, 2011

Important Notice / Aviso Importante

Hey again!

This entry is to thank all of you who have taken the time to visit my blog and look at my entries, I truly appreciate that. Subscribe to my blog so you get my entries as soon as I publish them :)
Also, I would like to let you know that I will not have internet access for a couple of weeks, therefore I will not be publishing anything during that time. I will be back with more ideas and more nail polish, I PROMISE!
Leave me your messages in the contact form or as comments on my blog entries, I love to read them all.
Once again thanks a lot!

Ésta entrada es para agradecerles a todos ustedes quienes se han tomado el tiempo de visitar mi blog y leer lo que publico, realmente agradezco su gentileza. Suscríbete a mi blog, de esa manera verás cuando publico algo en el instante que lo haga :)
Además de eso, quiero anunciarles que no estaré teniendo acceso al internet por un par de semanas, por esa razón no podre publicar entradas al blog durante ése tiempo. Yo volveré con muchas más ideas y más esmalte, LO PROMETO!
Déjenme sus mensajes en el formulario de contacto o como comentario a alguna de mis entradas anteriores, a mi me gusta leerlos. 
Una vez más, mil gracias!
xoxo,
Carol

Pin It

Tuesday, July 26, 2011

Crazy Purple Dots

This manicure started as a purple french I had in mind, I did not like it and I ended up with purple dots. Enjoy!
Éste manicure inició como un francés morado que se me ocurrió, pero no me gustó y terminé con puntos morados. Disfrútenlo!
  • New Lavander by Nabi
  • Buffy The Violet Slayer by Wet n Wild
1. Apply 2 coats of a lilac polish (New Lavender).
Aplica 2 capas de un esmalte lila (New Lavender).

2. Add dots with a darker color (Buffy the Violet Slayer).
Agrega puntos con un color más oscuro (Buffy the Violet Slayer).
 xoxo, 
Carol
Pin It

Monday, July 25, 2011

I Love Pink

Hey :)

I will share with you this short lived manicure. I had to change it 1 day after doing it because I needed one with more decent colors... But here you go!
Les compartiré este manicure que duró muy poco. Lo tuve que cambiar al siguiente dia de hacerlo porque necesitaba uno con colores más decentes. Aquí se los dejo!

Products Used:
Productos Utilizados:
  • Nude Pearl by Nabi
  • Expecting by Freshcover
  • PA12 Black by Kiss Brush On Nail Art
1. Apply 2 coats of a light/pearly pink (Nude Pearl).
Aplica 2 capas de un rosado pálido aperlado (Nude Pearl).

2. Apply 2 coats of hot pink (Expecting) diagonally covering just 1/2 of the nail.
Con 2 capas de rosado fuerte (Expecting) traza una línea diagonal y solo cubre la mitad de la uña.

3. Define the division of pinks with a black line and make black dots if you wish.
Define la división de los rosados con una línea y agrega puntos negros si lo deseas.

4. Voila!

I apologize for not having the step by step pictures... I lost that file :(
Una disculpa por no tener las fotos del paso a paso... Las perdi :(
xoxo,

Carol 
Pin It

Wednesday, July 20, 2011

Konad: French Stars

您好

Welcome back!
After my crackle polish experiment (link here) I had to do my nails once again. Ever since I have been growing them, I do not like to see them bare, I feel like there is no point on doing that.
Bienvenid@as nuevamente! 
Después de mi experimento con esmaltes crackle (enlace aquí) tuve que arreglar mis uñas otra vez. Desde que he dejado crecer mis uñas no me gusta verlas sin esmalte, siento que no tiene chiste hacer eso.

Products used:
Productos utilizados:
  • Glass Pink by Sinful Colors 
  • White Tip by Sally Hansen
  • Black Créme by Wet n Wild
  • Konad White Special Polish 
  • Konad m3 plate (I got this picture from a website, it is not mine)
1. Apply 1 coat of a light pink (Glass Pink)
Aplica 1 capa de un rosado pálido (Glass Pink)

2. Do a French tip with the color(s) of your choice (White Tip and Black Créme)
Haz un francés con color(es) de tu preferencia (White Tip y Black Créme)

3. Stamp over the tip with one of the designs on the plate. I used the Konad polish in white but for the black stars, I used the nail polish from WnW which worked fine.
Coloca un sello sobre el francés que hiciste. Yo usé el esmalte blanco de Konad pero para las estrellas negras, utilicé el negro de WnW el cual funcionó bien.

4. Apply a top coat. The end.
Aplica un protector. Y ya!

xoxo, 
Carol
Pin It

Crackle Polish: The Experiment

γεια

Today I am bringing you my first experiment: crackle polish. I know that O.P.I and China Glaze have those polishes, but also, more affordable brands started selling their crackles. I bought 2, one from Kleancolor and another one from Nabi ($1.99 and $0.99 respectively).
El día de hoy les traigo mi primer experimento, esmaltes que se agrietan (no escribiré crackelado porque esa palabra no existe en el idioma español - lo describiré como crackle  o esmalte agrietado). Yo sé que marcas como O.P.I. y China Glaze tienen estos esmaltes y de allí empezo esta recurrente moda, sin embargo, marcas más accesibles también lanzaron sus esmaltes que se agrietan. Compré 2, uno de Kleancolor y otro de Nabi ($1.99 y $0.99 respectivamente).

 I was wearing Freshcover's Camillia and this is what I did on my nails:
  • Index finger: Thin coat of Kleancolor's Black Crack
  • Middle finger: Thin coat of Nabi's White
  • Ring finger: Thick coat of Kleancolor's Black Crack
  • Pinky: Thick coat of Nabi's White
Como esmalte base tenía el esmalte Camillia de Freshcover y ésto fue lo que hice en mis uñas:
  • Índice: Capa delgada de Black Crack de Kleancolor
  • Medio/Corazón: Capa delgada de White de Nabi
  • Anular: Capa gruesa de Black Crack de Kleancolor
  • Meñique: Capa gruesa de White de Nabi

I waited and about 10 seconds into waiting, Nabi's started to crack nicely. Meanwhile, Kleancolor's was just sitting there showing minor progress.
Inició mi espera y durante los primeros 10 segundos, el crackle de Nabi empezó a agrietarse muy uniformemente. Mientras tanto, el de Kleancolor estaba mostrando un progreso mínimo.

When both polishes were completely dry, I was ready to apply a top coat to make a better comparison, and to my surprise I... Well, just look at the pictures!
Una vez que ambos esmaltes estuvieron completamente secos, estaba preparándome para aplicar un protector para hacer una conlusión mejor, para mi sorpresa... Las fotos lo dicen todo!


Conclusion / Conclusión:
 

KLEANCOLOR
NABI
Effect / Efecto
Minimal – Mínimo
Good - Bueno
Quality / Calidad
Bad – Mala
Good - Bueno
Buy It Again / Comprar Otra Vez
NO
Yes – Si
Price / Precio
$1.99
$0.99
Overall / Nota Final
0/5
5/5

xoxo,
Carol
Pin It

Friday, July 15, 2011

Red is Sexy

Buongiorno!

Today I had to do my nails because I was getting tired of my butterfly wing manicure. I did not come up with any design because in a long time, I had not painted my nails red. I love them! I hope you enjoy.
Hoy tuve que pintar mis uñas porque me estaba cansando del manicure de alas de mariposa. No hice un diseño porque desde hace mucho tiempo no pintaba mis uñas rojas. Yo las adoro! Disfruten.

I used 2 coats of Freshcover's Camillia over a base coat.
Usé 2 capas del color Camillia de Freshcover sobre una base.


I added a top coat.
Agregué un protector de esmalte.

xoxo,
Carol
Pin It

Thursday, July 14, 2011

Nail Polishes and Other Stuff

Hi!!!

Today has been a slow day for me. More than having the time to, I had the desire to go to Walgreen's and look around for Wet n Wild nail polishes. I did not own any WnW polishes until now, but I have heard wonderful things about this brand.
Hoy ha sido un día poco acontecedor para mí. Más que haber tenido el tiempo, hoy tuve todas las ganas de ir a Walgreen's e inspeccionar los esmaltes de Wet n Wild. Hasta el día de hoy, no tenía ningún esmalte de WnW, pero he escuchado cosas muy buenas sobre esta marca.

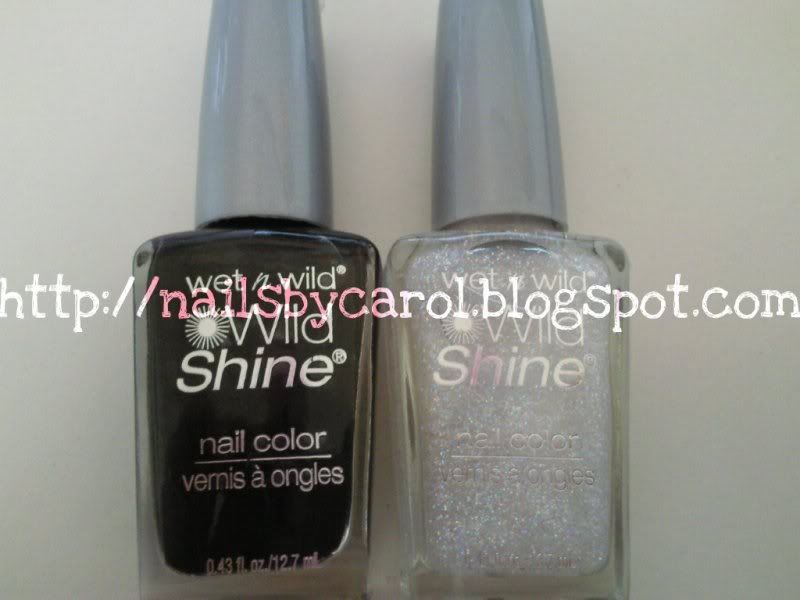
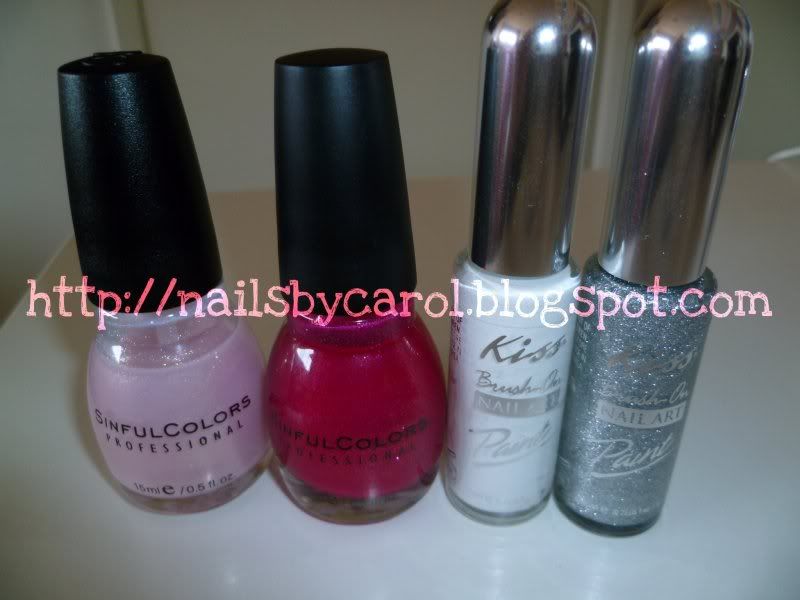
The nail polishes I bought are from 2 different lines. The first polishes I picked are from the the Wild Shine line  in the colors Black Créme and Hallucinate. The first one is a plain black polish, while the second one is a glittery and beautiful polish. I intended to get the white polish but they did not have it. The black polish I will use for my Konad stamping and the glittery, just for anything ($0.99 each).
Los esmaltes que compré son de dos líneas diferentes. Los primeros que escogí son de la línea Wild Shine y son los colores Black Créme y Hallucinate. El primero es un esmalte negro nada fuera de lo común, mientras que el segundo es un esmalte con demasiada brillantina. Mi intensión era comprar el esmalte blanco, pero no lo tenían. Quiero utilizar el esmalte negro para mis sellos de Konad y el de brillantina... para muchas cosas ($0.99 cada uno).

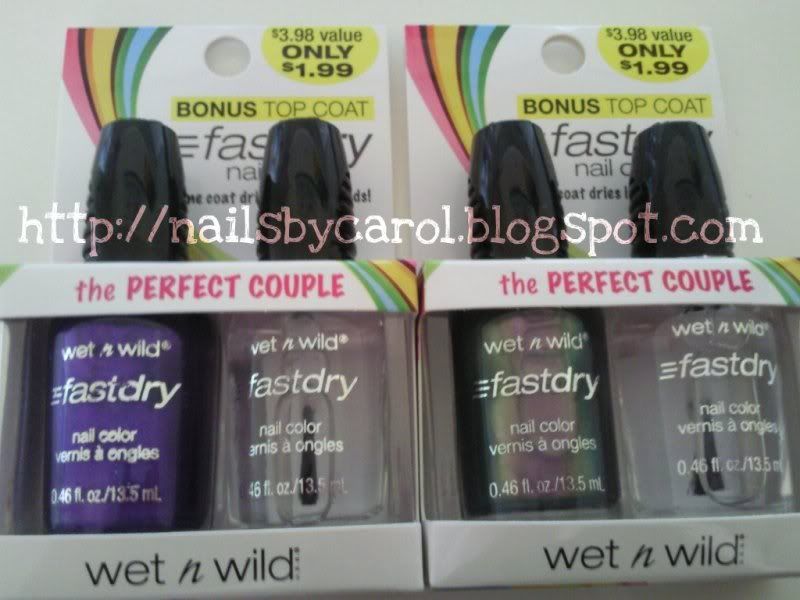
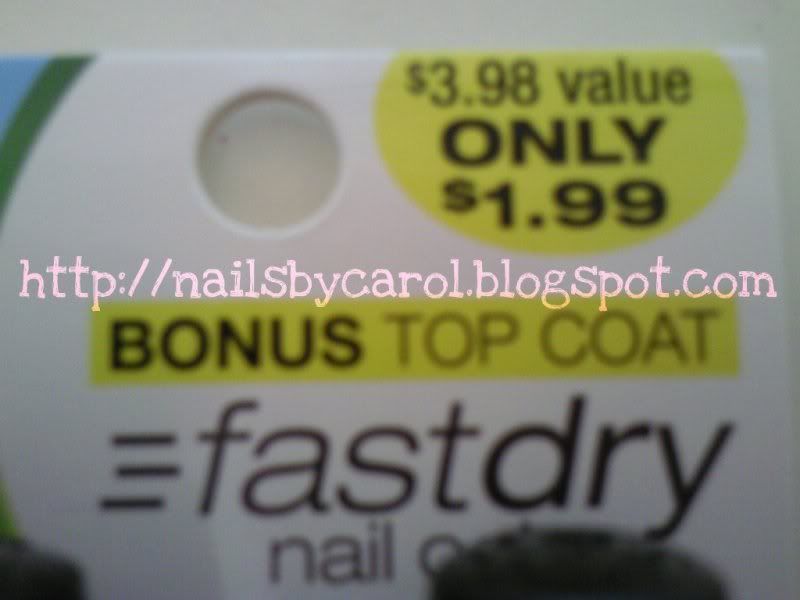
After making my first 2 choices, I saw the WnW fastdry nail color line and I got really excited about some of the colors. After picking some shades, I noticed this deal:
Después de mis 2 primeras elecciones,  ví los esmaltes WnW fastdry nail color y me gustaron varios colores. Después de eso, me dí cuenta de ésta oferta:
Why was this a deal? Well, each of the nail polishes from the fastdry line is $1.99 and with the packs, I got a nail polish and a top coat for the price of one! It was even more exciting when I realized that the 2 polishes I liked were in a combo pack :)
Por qué fue una oferta? Bueno, cada uno de los esmaltes de la línea fastdry cuesta $1.99 y en éstos dúos viene un esmalte además de un protector por el precio de uno! Me gustó aún más cuando me fijé que noté que los 2 colores que me habían gustado venían en dúo :)

The shades I picked are Buffy the Violet Slayer (funny, huh?) and Gray's Anatomy (nope, I do not watch the series). I loved all the names, very playful!
 Los colores que elegí son Buffy the Violet Slayer (sí, como Buffy la Cazavampiros, en este caso, Cazavioletas) y Gray's Anatomy (no, no veo esa serie). Me gustaron mucho los nombres de ésta línea, demasiado ocurrentes!
 

I also stopped by Sally Beauty Supply to get some hair stuff I needed. Of course I went to the nail section! I was tempted to get some Finger Paints polishes because they had a promo, get 3 for the price of 2. None of the colors jumped at me, so I just skipped that section. Then, over at the China Glaze stand, they had a promo where you have to buy 3 polishes and you get some other brand's drying drops free, I also skipped that... Those deals tend to be a bit tricky. However, I did buy some other nail stuff.
También fui a Sally Beauty Supply para comprar ciertas cosas para mi cabello. Claro, tuve que pasar a la sección de uñas! Tuve la tentación de comprar unos esmaltes de Finger Paints porque estaba una promoción de comprar 3 al precio de 2. Ninguno de los esmaltes me llamó la atención, así que seguí viendo otras cosas. En la sección de China Glaze también estaba una promoción de comprar 3 esmaltes y llevarse gratis unas gotas de secado de esmalte de otra marca, cosa que también evité... No me parecieron ofertas para aprovechar. Sin embargo si compré otras cosas para las uñas.

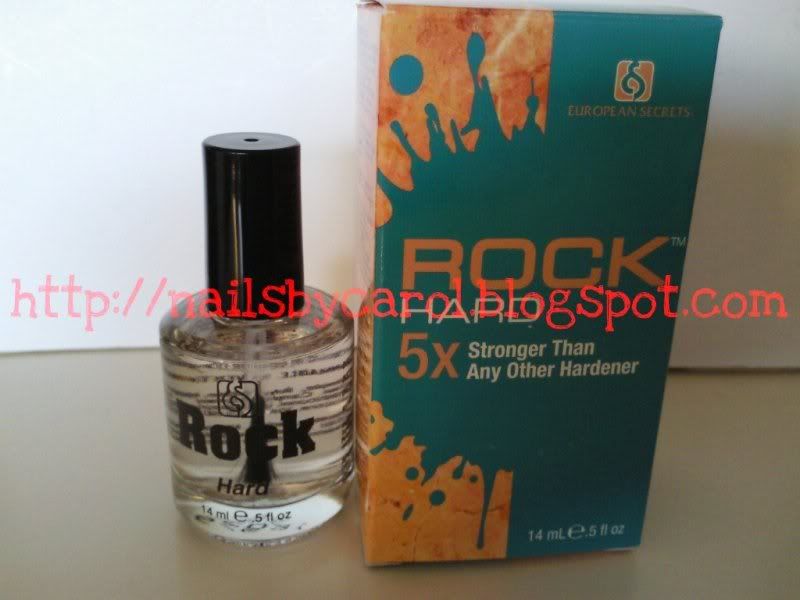
I bought this nail strengthener called Rock Hard. It claims to be 5x stronger than any other hardener. It is 14mL and it costs $5.49. I will review it when I try it.
Compré un endurecedor llamado Rock Hard. Se dice que es 5 veces más fuerte que cualquier otro. Contiene 14mL y me costó $5.49. Una vez que lo haya probado daré mi opinión al respecto.

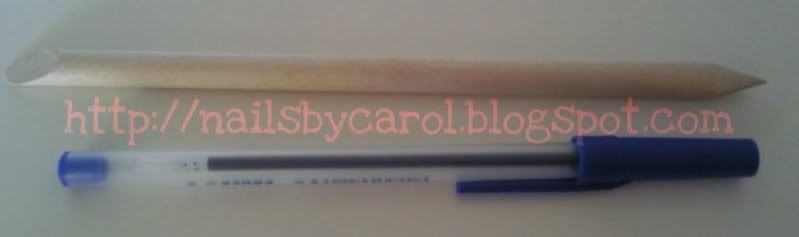
I also bought the Ultra Birchwood Stick for $0.69. It is just a giant wood stick. Notice the size compared to a regular pen.
También compré el Ultra Birchwood Stick por $0.69. Es un palito de un tamaño no tan pequeño. He aquí la comparación con un lapicero regular.

This was too much. 
Ésto fue mucho.

-Carol
Pin It

Tuesday, July 12, 2011

Butterfly Wings

Ciao!

Today I did 2 manicures. The first one turned out really ugly and uninspired so I had to do my nails again. I was not finding inspiration, so I started looking up different nail designs on YouTube and on different blogs I follow. I came across one that had butterfly wings and it was beautiful; I just had to recreate it. As I kept looking, I realized many people have the same design so this was not my idea, I don't know whose idea it was. What matters is that I took off the ugly manicure I had at the beginning.

El día de hoy me hice dos manicures. El primero me pareció feo y sin inspiración, así que me lo quité. No encontraba nada nuevo que hacerme, así que opté por buscar algo en YouTube y en los blogs que sigo. Encontré uno que tenía alas de mariposa, era muy lindo y sentí la necesidad de hacerlo. Seguí buscando más diseños similares y me dí cuenta que ya varias personas tenían el mismo patrón de líneas y diseño, por eso no sé de quién es la idea inicialmente. Lo que importa es que me quité el diseño horrible que me hice antes.

Products used:
Productos utilizados:
  • Base and Top Coats
  • Psychedelic by LA Girls Disco Brites
  • PA12 Black by Kiss Brush On Nail Art
  • Black Expressionism by Finger Paints
  • 07 White Tip by Sally Hansen
1. Apply 2 coats of yellow nail polish (Psychedelic).
Empieza con dos capas de esmalte amarillo (Psychedelic).


2. Start doing a pattern with a black nail art polish (it doesn't need to be like this).
Continúa con un patrón de líneas en color negro (no tiene que ser así como este).
 
This will be your skeleton -well, the beginning of the wing ;) .
Ésto será tu esqueleto - bueno, será el inicio del ala ;) .

3. Fill out the tip with black polish.
Rellena la punta con un esmalte negro.

4. Dot the tip with white.
Haz puntitos blancos en la punta.


5. The end!
Terminamos!

 -Carol
Pin It

Wednesday, July 6, 2011

Pink Party

Hola!

Products Used:
Productos Utilizados:
  • Base and Top Coats
  • Glass Pink by Sinful Colors
  • Forget Now by Sinful Colors
  • White by Kiss Brush on Nail art
  • Silver Glitter by by Kiss Brush on Nail art


1. Apply 1 coat of light pink (Glass Pink) to even out the nail color.
Aplica 1 capa de esmalte rosado claro (Glass Pink) para unificar el color de la uña.

2. Apply 2 coats of hot pink (Forget Now) and wait until dry.
Aplica 2 capas de rosado fuerte (Forget Now) y espera hasta que seque.

3. Take your white nail art polish (PA02 White) and draw 3 little lines from the corner top to the bottom (sort of like a feather).
Con un esmalte decorador blanco (PA02 White) dibuja 3 líneas de una de las esquinas superiores hacia abajo (algo como una pluma).

4.Add 2 dots below the middle line.
Haz 2 puntos abajo de la línea del medio.
 
5. Give the white decoration some dimension with a silver glitter (PA10 Silver Glitter).

Agrega dimensión al decorado blanco con un poco de brillantina plateada (PA10 Silver Glitter).

6. Add a top coat.
Usa un protector/sellador de esmalte.
-Carol
Pin It